After catching the gardening bug last fall, I’ve been anxiously waiting for Spring to arrive so I could continue growing in my new hobby.

Of course I’m excited to see how the Azaleas and Hydrangeas I planted last fall do in their first year.
I bought quite a few terracotta pots in various sizes at a garage sale last year and hope to fill them all with some incredible flowers in my beginner container garden. I plan to continuously update this page as a sort of journal of my gardening experience.
My New Garden Plot
Oh, I know it’s the wrong time of year for planting tulips, but my sister Mary gave me some bulbs when I was in Kansas City in mid-March. I found a couple places around the yard that needs some color and rather than let the bulbs go to waste, I planted them. Don’t know what I’ll get.


After clearing a space for planting some misc. bulbs, I decided to expand it a little to make room for some various flowers. The bulbs are in the center and on the sides and front I’ll plant some colorful annual flower seeds. Right now, I’m planning on: White Asters, Cosmos, Black Eyed Susans, Lilliput Zinnia, Marigolds, Bachelor Buttons, Candytuft, Gloriosa Daisy, Blanket Flowers, Calendula, Snapdragons, Western Yarrow, Zinnia, White Alyssum, and some Dwarf Pentunias. That might be too many varieties in the somewhat small space but hopefully my dense planting will yield a nice bed of flowers.

Towards the end of April (25th.) I began planting seeds in my new garden bed. Three rows with the previously planted bulbs in the center.
Back row: flanked on either side – Coleus. Black Eyed Susan in the middle. Calendula on the left. This should produce bright yellow and orange flowers, historically used for medicinal and culinary purposes. I’ve been struggling identifying the sprouts. So far, it’s looking like only a few of the seeds sprouted. Gloriosa Daisy on the right.
Middle row: Impatiens on far left. (Caladium not planted yet). Misc. bulbs in center. (Caladium not planted yet). Snapdragons on far right.
Front row: Marigold in the center. These plants are said to be very easy to grow and I’d concur they do seem to be doing best of everything I planted in this area.
On each front corner I planted White Alyssum which should form a carpet of tiny flowers (3-12 in. tall) I thought would look good on the borders. Sweet alyssum flowers best with at least six hours of full sun, but can tolerate partial shade. This plant never really produced much in this location and may be because it didn’t get enough sun. It seemed to do better in my front garden area where they get more sunlight. This is regarded as an annual so we’ll see how they fare through the winter. Perhaps next season I will try this plant in containers or hanging baskets as they attract butterflies and is a pollinator magnet—hummingbirds love it too.
By early June (2nd.) plants were emerging. The first to appear were the Marigolds and Black Eyed Susans. No sight of the bulbs I planted at first. Don’t know if they’ll appear next year or perhaps their dead.

By mid-June, activity was picking up… albeit pretty slowly. Looks like the Black Eyed Susans and Marigolds are ready to do something. When I did the planting in this area it received some pretty good sun… but as the trees shading the area grew, this (should be full sun) area is only getting partial sun.


Two of the plants did survive and flowered in mid-August.

Just as things seemed to be coming along, rabbits discovered the bed and decided to chew down just about everything. They seemed to particularly enjoy the Black Eyed Susans, and they were mostly destroyed.
I’m thinking next season, instead of planting seed in this bed I will instead plant some kind of perennial plants.
While not necessarily the last frost, I planted the first seeds of the season on April 8.
I chose the Bachelor Button also known as cornflowers, because they are more cold hardy and should survive any light frost. Quite honestly, I just wanted to start planting and couldn’t wait any longer.
I don’t know what variety this Bachelor Button is and it may get too tall and unruly for this pot. But, what the heck… I’m a beginner and love experimenting.

These need full sun for best growth, although they can tolerate partial sun. Lower light situations will result in fewer flowers and leggy plants. I will plan to pinch them back to force denser bachelor’s buttons and more buds as the young plants mature.
I’m also planning on planting these in my newly created flower bed but I’ll wait until later when there is less chance of frost..


A week after planting, about 75% of the Bachelor Buttons seeds are beginning to sprout. I’ve been watering these daily and keeping them in direct sunlight. Temperatures are still pretty cool… highs in the 60’s and 70’s with lows in the 40’s.
By June, the plant got bigger and pretty spindly.

Coleus
Another plant that caught my eye while wandering through Johnson’s Garden Center was the Coleus (Coleus blumei). This plant has somewhat similar leaves as the Caladium, although not as large. They have some of the most stunningly colored foliage—in combinations of green, yellow, pink, red, maroon, etc. Coleus also have a wide variety of leaf sizes and overall shapes.
Since I have to wait a while longer to wake up my Caladium bulbs, I figured I needed some of these for the time being. So, I bought a flat of various kinds and went about putting them into some pots.


The Coleus needs fertile, well-draining soil and usually perform best in areas with partial shade. Though Coleus plants are tropical, heat-loving plants, direct sunlight can cause undesirable effects such as sunscald and wilting. Symptoms of sunscald include bleached leaves, burnt leaf edges, and translucent spots on leaves that eventually turn into holes. I’ve been rotating these plants from shade to partial sun. They seem to do best in a partial shaded area. Sunscald is more likely to happen if the plant isn’t watered enough, or if soil does not drain well.
I’ve noticed some brown spots appearing on the leaves of my Coleus Jade and one developed into a hole. Thinking it might be sunscald, I’ve moved the plant to an open shaded area that gets no direct sunlight.

Finding the correct watering for these plants has been a challenge. Flooded soil can lead to root and stem rot, causing the plant’s ornamental leaves to turn brown, eventually killing the plant. Overwatered plant’s leaves initially turn yellow and droopy, eventually turning brown.

Coleus plant flowering begins in summer as a signal that winter is coming and the plant should produce seed to continue its genetic dynasty. To allow the plant to continue flowering often leads to a rangy plant, however, so it is best to pinch the spiked blooms to keep the plant compact and thickly leafed.
Coleus plant flowering begins as a signal that winter is coming and the plant should produce seed to continue its genetic dynasty. Flowering often leads to a rangy plant, however, so it is best to learn what to do with coleus blooms if you want to keep a compact, thickly leafed pl
Read more at Gardening Know How: Coleus Plant Has Flower Spikes: What To Do With Coleus Blooms https://www.gardeningknowhow.com/ornamental/foliage/coleus/coleus-plant-blooms.htm
Read more at Gardening Know How: Coleus Plant Has Flower Spikes: What To Do With Coleus Blooms https://www.gardeningknowhow.com/ornamental/foliage/coleus/coleus-plant-blooms.htm
Coleus plant flowering begins as a signal that winter is coming and the plant should produce seed to continue its genetic dynasty. Flowering often leads to a rangy plant, however, so it is best to learn what to do with coleus blooms if you want to keep a compact, thickly leafed plant.
Read more at Gardening Know How: Coleus Plant Has Flower Spikes: What To Do With Coleus Blooms https://www.gardeningknowhow.com/ornamental/foliage/coleus/coleus-plant-blooms.htm
Read more at Gardening Know How: Coleus Plant Has Flower Spikes: What To Do With Coleus Blooms https://www.gardeningknowhow.com/ornamental/foliage/coleus/coleus-plant-blooms.htm
Coleus plant flowering begins as a signal that winter is coming and the plant should produce seed to continue its genetic dynasty. Flowering often leads to a rangy plant, however, so it is best to learn what to do with coleus blooms if you want to keep a compact, thickly leafed plant.
Read more at Gardening Know How: Coleus Plant Has Flower Spikes: What To Do With Coleus Blooms https://www.gardeningknowhow.com/ornamental/foliage/coleus/coleus-plant-blooms.ht
Read more at Gardening Know How: Coleus Plant Has Flower Spikes: What To Do With Coleus Blooms https://www.gardeningknowhow.com/ornamental/foliage/coleus/coleus-plant-blooms.ht
I plan to also pinch the shoots of the young plants to produce bushier growth.


Caladium
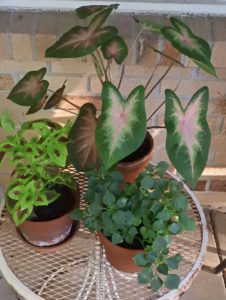
Tried my first container arrangement to highlight three Caladium plants that should grow to 14 to 20 inches. In the center is Purple Fountain Grass that can grow to 2 to 3 feet tall. Around the border of the container is White Alyssum that should be about 4 inches tall. I’m hoping the Alyssum will fill in and spill over the sides.
It didn’t take long for this effort to fail. The Caladiums all drooped and began to wilt and looked absolutely horrible. I pulled out the Alyssum and transplanted those to my front garden and commenced to attempt to revive my poor Caladiums.

I had planted about a dozen tubers in pots and into the ground in the spring after the last frost. I was afraid it might have still been too early because it’s suggested that planting the tubers should be once the soil temperatures warmed to 60°F-70°F, and our temps hadn’t really warmed that much. I did not check the ground temperature directly but tried to wait until the ambient temps warmed up.


Despite my failure with store bought potted Caladiums, by July I began seeing the tubers I had planted earlier began to sprout.
These took a while to appear as I planted them months ago. It’s been fascinating to watch as the sprouts slowly appear and then grow taller. Once they reached their height they began to unfurl their leaves over the next few days.
Where most plants don’t tolerate shade very well – caladiums love shady areas! Overexposure to the sun results in holes with brown edges in leaves between the main veins. I’ve been watering my caladiums early in the morning or late in the afternoon to help eliminate sun burn.
Caladiums grow best in slightly acidic soils. Because of this they will benefit from a monthly sprinkling of bone meal. If you use commercial fertilizers, be gentle. Too much nitrogen will damage the tubers and affect the color of the foliage.


There is a wide variety in types of caladium, as there are over 1,000 cultivars on the market. I only have a few of them now and don’t know their exact cultivar. Next year I will expand the varieties and document their cultivar. I will also plan to plant them in tighter groups to enhance their visual appeal.


Caladium tubers are sold in various size grades based on the diameter of the tuber. Bigger tubers yield more foliage. Generally the larger the tuber you purchase the better the performance as the tuber is the source of energy reserve for the plant. Therefore the larger the tuber then the larger the energy reserve thus the opportunity for better performance.
I’m really liking the size and patterns on the leaves. Of course, this is what attracted me to Caladiums in the first place. In late June these leaves had grown to about 6×10 in.
What’s missing in my garden is volume and density. In the future I will plant more of these and I’ll plant the tubers closer together.


So far I’ve been pretty impressed with the growth of my Caladiums. This one has grown the largest leaves reaching 12 in. x 7 1/2 in.
Most of my plants were planted in containers with only one tuber per pot. After watching these grow I think in the future I will plant more than one tuber per pot. Now, the exception might be if I have a really large tuber.


I planted some Caladiums in the front garden area that have been doing pretty well. They get partial sun in the afternoon and shade the rest of the day.
I lost the white one to what I believe was a rabbit. I found the stems broken at ground level one day and they have not come back. I’ll have to remember to dig this tuber up in the fall to replant next year.


This particular Caladium surprised me as it kept sending up leaves throughout the summer. The leaves weren’t as large as some other plants, but there were a lot of them.
While most of mine have only one or two leaves per pot, one of my plants has generated 22 leaves from a single tuber..


 I notice that after placing this plant in a mostly shade area on my front porch, the reddish color in the leaves diminished. I’m going to move the plant in to an area that gets more sun and see if that doesn’t brighten up these leaves.
I learned from my brother living in Sebring Florida that near him is the “Caladium Capital of the World” in Lake Placid, FL. They hold a Caladium Festival in July that I really must arrange to attend some day. Too bad for me that it’s held in probably the hottest time in the summer, but that’s good for the Caladiums as they love that kind of weather.
There are several growers in Florida where I will likely order from for next season:
Florida Boys Caladiums
Classic Caladiums
Happiness Farms Inc.

An interesting development in my Caladiums appeared recently. These plants are not just all about exquisite, colorful leaves. A mature plant can develop a flower-like bud.
This is a small spathe, a type of inflorescence found in the Aroid class of plants. The spathe is a far cry from what we usually deem as flowers, lacking petals and most other features of a typical bloom. They do have an interesting structure and are the reproductive system of the plant. Inside the curved spathe is a spadix. This is a rigid structure that holds the sexual organs of the plant.
Although many people don’t like them and will pinch them off. From what I’ve learned, these flowers are perfectly okay to leave as they will not hamper the growth of the plant. After a few days, this spathe turned brown and dried up so I cut it off. Although I left a few on some plants, I’ve cut them off others that didn’t seem to be thriving as much. Perhaps the little added energy from cutting the spathes will help those plants.
By October, most of the plants began to droop and looked like they were ready to be put to bed for the winter. What I did was to dig up all the tubers, dry them out, and store them in labeled boxes in a dark dry place in my house. So now they are ready for planting in the spring along with some additional plants.

Hens & Chicks
This was a plant that I started with last year. While they looked healthy back then, many of them did not survive the winter and squirrel attacks.


These succulents are thick, fleshy, and engorged to retain water in their leaves and stems. They are perennial and bloom in midsummer requiring full or partial sun, although should tolerate light shade.
Another aspect of growing these and other plants that fascinated me was the ability to propagate them for even more plants. The species I chose to start with are called Sempervivium which grow close to the ground with leaves formed around each other in a rosette, and propagating by offsets. The “hen” is the main, or mother, plant, and the “chicks” are a flock of offspring, which start as tiny buds on the main plant and soon sprout their own roots, taking up residence close to the mother plant.


I was surprised when a few of them grew really tall and produced some wonderful flowers on top. Thanks to my Micro-Nikkor lens I was able to study them pretty close and was fascinated at their intricate details. Apparently, this indicates the plant has reached it’s full potential and after flowering the mother plant dies.


I took numerous sprouts and replanted them. Some did not survive the transplant shock and others thrived.


The problem I discovered with my Hens & Chicks this year is BUGS! I really didn’t notice them with the naked eye but when looking at close up photos they became apparent. I think the little white fuzzy ones are mealy bugs and I’m thinking the darker ones are aphids.
My first solution was to use Neem Oil. Be careful though, not all Neem Oil is created equal. Many of the products sold on the shevles at the big box stores and even garden centers contains very little Neem Oil – read the labels. What you want is 100% Cold Pressed Neem Oil – not an extract. One of the popular brand name products, Bonide, contains ONLY 0.9% Extract of Neem Oil. What I bought at the garden center store contained Cold pressed Neem Oil… but only 70%. I had to order from Amazon to get the real deal: 100% Cold Pressed Neem Oil.
A few more plants I placed in several areas:

Also known as Million Bells, for their many flowers, or Trailing Petunias, for their habit and bloom shape, these beauties should be perfect in a hanging basket to give my backyard some color right now. Technically, Calibrachoa are perennials, but I will likely treat this one as an annual, since they don’t like temperatures below freezing.
They like full sun and moist but well-drained soil. Calibrachoa are also self-pruning, which means that older flowers will drop off, rather than persisting on the plant, so no need for dead-heading! Although, pinching back the plant can prevent it from becoming too leggy.
Calibrachoa
I was wandering through Lowe’s garden center today when these red Calibrachoa caught my eye.


Trailing Pansy
Picked up this hanging basket at Home Depot because I thought it would add some nice color in my backyard.


Ended up hanging it out in the middle of my yard alongside a hanging bird feeder. It is basically the centerpiece when looking out my back window. It has really thrived with its white and yellow flowers draping below the basket. I have been regularly deadheading the spent flowers to encourage more growth. I’ve had to water this plant almost daily as when it gets thirsty it’s obvious; the flowers all droop and looks sickly.


Marigold
Marigolds have cheery, pom-pom, anemone, or daisy-shaped inflorescences in colors ranging from yellow and gold to orange, red, and mahogany. This species is the French marigold (Tagetes patula) which are more compact in stature, with smaller flowers than the African marigolds that are much larger.
I picked these up as potted plants originally and replanted them into a window planter where they have been doing pretty well. I’ve been pinching the spent flowers so it keeps reproducing.

Hypoestes
Another plant with a somewhat similar appearance to the Coleus I picked up was the Hypoestes or Polka Dot Plant. I’m thinking this will be a bit smaller and bushier than the Coleus.


Impatiens
These are some of my sister’s favorites so I decided to grow some.
Impatiens flowers are bright and cheerful annuals that can light up any dark and shady part of your garden. I bought these as well-rooted plants from the garden center, but I’ve also planted some from seed.
They enjoy moist but well draining soil and partial to deep shade. They seemed to thrive for the first month and then began sorta losing their enthusiasm. Some of the the leaves turned yellow and thinking they may have gotten too much direct sun, I experimented with some different locations.
I decided to try using Epsom salt – actually magnesium sulfate – to help the plants grow, producing more flowers, increasing chlorophyll production and deterring pests. I really didn’t see much improvement so I tried adding a bit of bone meal to the soil.


Begonia
I purchased a couple flats of Begonia’s at the garden center and planted them in a couple different areas. I put a couple next to my Hydrangea’s in the back, a couple rows of them in my front garden area, and a couple in containers.


Daffodil
Petunia
Petunias need full sun or they will become spindly. They don’t tend to flower well in shade. Petunias are fairly heat tolerant, so you shouldn’t have to worry about watering them frequently.
Their height can vary from 6 inches to 18 inches and may get leggy by midsummer, so I’ll want to prune the shoots back to about half their length.
Whisky Barrel
I also picked up a plastic whisky barrel at Lowe’s and filled it with a mixture of potting soil and compost. To fill some of the space at the bottom of the barrel I used plastic water bottles.
In mid-May, I planted Glorisoa Daisy in the center with Zinnia, Evening Primrose, Candytuft, and Blanket Flower in four quadrants. Everything was surrounded with Alyssum.


I know now what mom and dad enjoyed so much about watching the grass grow. I can spend hours on the front or back porch inspecting flowers, watching birds, and just whiling away the hours without a care. Sure provides a sense of sanity in this crazy upside down world we live in today.
Front Garden Area
In May I began working on my front garden area. This had long been a pretty sparse and barren piece of dirt with no curb appeal. I was excited to change that and completely remake this area. I had planted last fall a single Purple Dragon Dead Nettle and began by adding two more to encourage more spread.


Sunshine Ligustrum
I chose this plant for the front garden as a sort of centerpiece. It is billed as providing brilliant golden foliage all year long. The key here, though, is it needs full sun and this area does not get full sun. As a result, this may not get that beautiful golden foliage and may lose it’s leaves in the winter. So far the plant has stayed pretty green.
This should grow to 3 to 6 feet in height and 3 to 4 feet wide. That should make a nice fit to fill this corner of the garden.


Now, this Hosta was one I got from my sister in Kansas City. She thinned out some she had and brought several to me. I planted them in my front garden area and they seem to be doing pretty well. I don’t know what this one is called but it looks a lot like the Christmas Tree Hosta that died on me.


Seems like one of my most successful plants and most planted is the Coleus. I’ve planted them in planters, in my backyard garden, and now into my front porch garden.


Caladium
Of course, the Caladium was the plant I most wanted out front here. It’s the plant that got my most attention last fall and I had to curb my enthusiasm throughout the winter before being able to plant in the spring.
I only planted four tubers which have all been producing some wonderful leaves.
By mid-summer, they seemed to thrive and continuously put out new leaves into late August.
I did have one mishap late in July when a rabbit or other unidentified creature got into the bed and broke off the leaves of the white caladium. The plant did later produce one leaf several weeks later but never got very large.


Lilliput Zinnia
I’ve also planted some Lilliput Zinnia’s in the front garden. They should grow to about 16-24 inches and provide some nice color variation into the back area of the garden. My only concern is these require full sun and they are only getting partial sun.
To promote a more bushy plant, I pinched back to above two leaves on these young plants. I will also plan to deadhead the plant after it flowers to encourage even more flowers. I’ve only been watering these every two days or so.
At one point a rabbit got to the plants and pretty much ate them down. A couple did survive but never did well after that.

Begonia
Saw these at the garden center and thought they would add some nice color to my front garden. Wax begonias, the more popular variety of begonia, can be found in lots of different sizes and can grow from as small as six inches to nearly three feet tall.
Wax begonia is a compact, mounded, succulent, and fibrous-rooted plant with fleshy stems and green to bronze leaves. Loose clusters of cymes in leaf axils, single or double and in various colors, bloom from spring to frost.


Nasturtium
Wanting more color in the front garden, I planted these Nasturtium from seed. Not many of the seeds germinated and I’ve only got a few growing plants. Ultimately, these plants did not survive the summer and I never saw them bloom.
It’s been quite a bit of work, but the front porch area is beginning to look pretty good. I haven’t put any mulch down as I need the plants to emerge without covering them up.


Some Failures
Hosta
I planted a Christmas Tree Hosta last year in a container that I cut back for winter. By April, it was beginning to show some signs of new life. Like my other experiments, I don’t know what I’ll get this year but I hope it’s as full and beautiful as it was last year.

")
I won’t show you the outcome of this plant as my best guess is that it’s dead. The promising shoots I saw in early Spring had wilted to nothing but brown stubs. I’ll give it a little more time to see if it revives before I dig it up and toss it out.

Don’t know what happened to them, but soon after bringing them home they gradually deteriorated to the point where they eventually died.
New Guinea Impatiens
I didn’t know anything about this plant when I saw it at the garden center. Of course, the stiking leaves is what got my attention. I figured it might be a nice variation in my interesting leaf collection.
They want full to part-sun and are not drought tolerant. New Guinea impatiens do best with morning sun and afternoon shade in a garden with eastern exposure. I put them on my front porch that was mostly shade and tried to keep them watered.

Come on back regularly to see my updates as I plant more and they mature.


